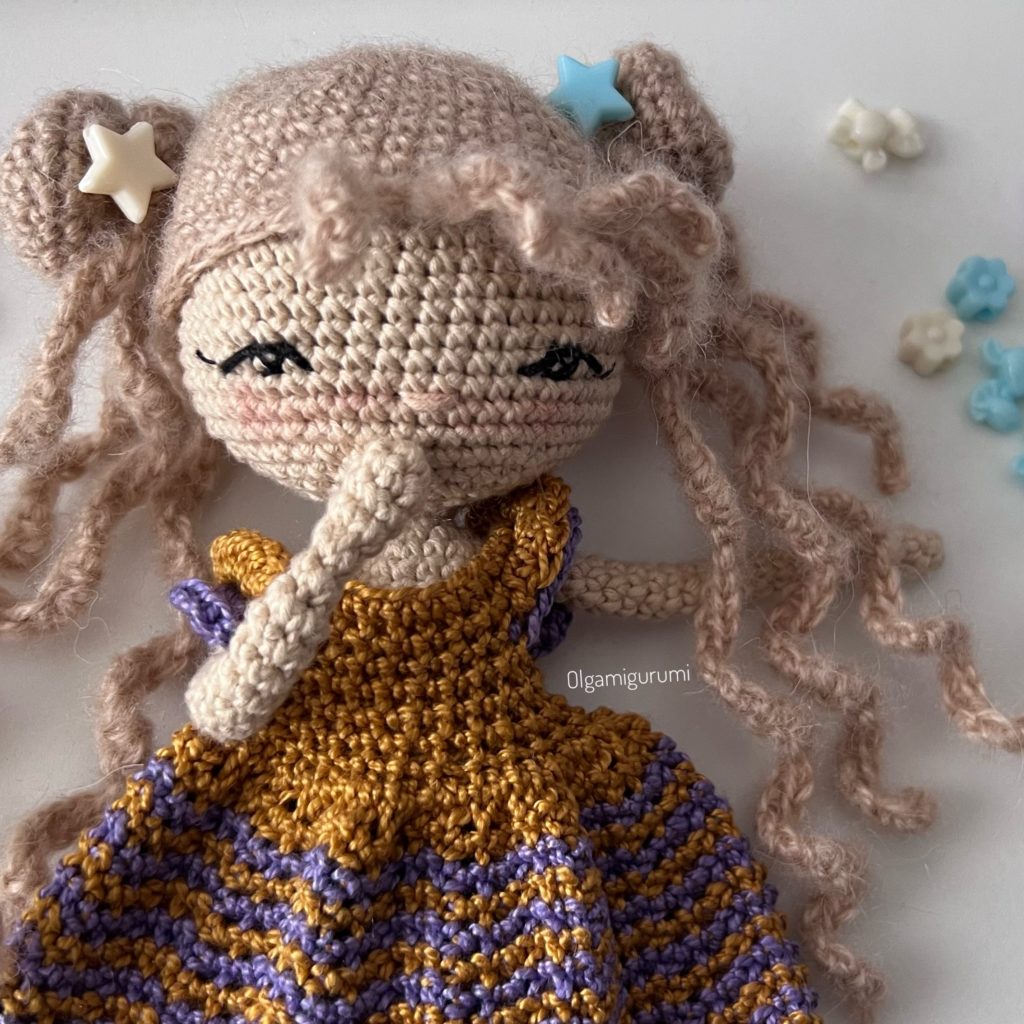
Would you like to add a unique and personal touch to your amigurumi dolls? You’re in the right place! In this blog post, I’ll show you how to create a wig with bangs, curly pigtails, and buns, all handcrafted and adaptable to any doll size. This wig is interchangeable, meaning you can change your doll’s hairstyle whenever you like, without having to sew it on permanently.
What You’ll Learn in This Tutorial
In this tutorial, we’ll create a complete wig for your amigurumis, consisting of:
- A base with bangs: Ideal for adding a realistic touch to your doll.
- Two curly pigtails: Adding volume and character to the hairstyle.
- Two spherical buns: An adorable detail to complete the look.
And the best part? This design is universal, so you can adapt it to any doll size and use the yarn of your choice.
Materials Needed
Before you begin, make sure you have the following materials ready:
- Angora RAM Yarn by YarnArt: This yarn is perfect due to its vibrant colors and softness. I’m using color 7359 Light Sand, which is simply gorgeous.
- Crochet hook suitable for the yarn thickness.
- A bald amigurumi doll: You can use any doll or crochet the Emilie doll available on my channel.
- Measuring tape, stitch marker, scissors, and yarn needle.
- Stuffing (optional) to add volume to the buns.
How to Make the Wig
To learn how to crochet this wig step by step, check out the video tutorial I’ve prepared. Don’t miss it! It’s easy to follow, and I’ll show you every detail to achieve a perfect result.
Benefits of Creating This Wig
- Interchangeable: You can change your doll’s hairstyle as often as you like.
- Customizable: Adjust the size, color, and thickness to your preferences.
- Easy to Make: Though it may seem complex, you’ll be surprised at how simple it is with this tutorial.
Tips for Personalizing Your Wig
- If your doll is larger or smaller, adjust the base size and pigtail length accordingly.
- Add ribbons, beads, or any other embellishments to give your wig a unique touch.
Conclusion
I hope you enjoy making this wig as much as I enjoyed designing and crocheting it. It’s a fantastic way to personalize your amigurumi dolls and experiment with different styles.
Don’t forget to share your creations on Instagram or Facebook by tagging me @Olgamigurumi. I’d love to see how your wig turns out.
Want More?
If you enjoyed this tutorial, don’t forget to subscribe to my YouTube channel and follow me on social media to stay updated on the latest projects and tutorials.
- Instagram: @Olgamigurumi
- Facebook: Olgamigurumi
- TikTok: @Olgamigurumi
See you in the next post! 🧶✨

